


Fun Spring Break Activities for You and Your Toddler
Your calendar says Spring Break. This is a great time to have some activities ready each day to enjoy with your kids. Below are some ideas on how to plan for a weeks worth of fun.
- Pick a theme and do activities around it (one a day) to create an at home camp- we picked spring.
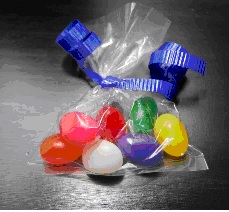
- Read a book on “How Things Grow” and plant Magic Jelly Beans after to see what they grow the next day.
- Flower play dough for spring.
- Create a spring play dough garden.
- Flower Shop.
- Finger print dandelion craft/ Fly away dandelion with Q- tip.
- Frogs on log art with song.
- Kite Art.
How things grow
- Prepare a little bag of “magic” Jelly Beans after learning about the concept of “How things grow”. There are many excellent books you can read with your kids on this topic, such as “My first book about how things grow” by Usborne books, or “How things grow” by Eric Carle.
 2. Plant them
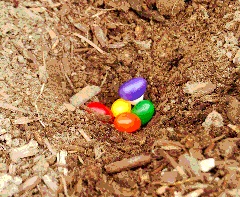 3. The next morning go and see what grew overnight
Spring Flower Play Dough
Basic recipe
- 1 cup all-purpose flour
- 1 cup water
- 1/4 cup salt
- 2 tsp cream of tartar
Extra items
- Red food coloring
- Rose water or flower-scented oils such as lilac, jasmine, rose or geranium
- Real flower petals
Add the ingredients for the basic recipe to a saucepan, along with a few drops of the red food coloring (optional: a drop or two of the rose water or scented oil). Stir well (older kids can help with this) until everything is combined. It might look a bit lumpy. Place the saucepan over low heat and keep stirring until the mixture will begin to thicken, forming into one large ball. Place it on parchment paper and leave to cool for a few minutes. When it is cool enough to handle, knead the dough for thirty seconds or so, which will make it less lumpy. If you used rose water, the play dough should be taste-safe. To make the dough look extra special break up the petals into small pieces and work them into the cooled dough.
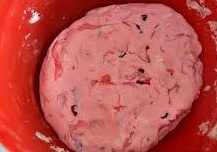
Your new play dough will look and smell like spring!
To use the play dough using our spring theme we had fun rolling it out and using a flower-shaped cookie cutter to make flower shapes. If you have play dough at home you can combine the freshly made flower shapes with some green and yellow play dough to create flowers.
Spring Play Dough Garden
What you will need for your spring play dough garden is your spring flower play dough (or any other play dough you have at home or you might have made), an egg carton and artificial flowers. You can set up this activity in an unstructured way so your kids can create and explore with the materials and build their flower gardens as they wish using their imagination.
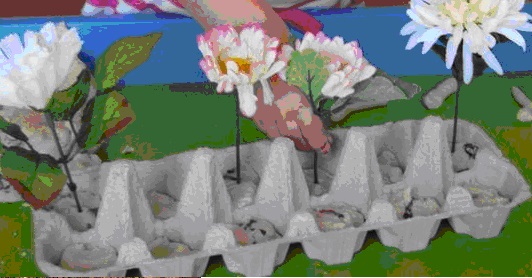
The play dough can be used with or without the egg carton sticking the flowers in the play dough, the kids can pretend to plant them in the egg carton or any other container you may provide (what also works well are empty apple sauce cups).
This activity is not just fun but will enhance your child’s creative thinking and concentration skills. It will increase spatial awareness by experimenting with shape and space. You can work on oral language development by talking about the book you just read in combination with this activity or just experimenting with new words. Your child will work on their fine motor skills and coordination and self expression.
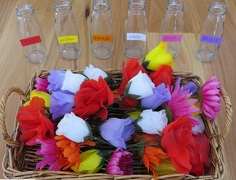
Flower Shop
Another fun activity is to create a flower shop. Here your child can get creative making bouquets; you can work on practicing their colors, problem solving and social interactions. You can create order forms with a picture of the flowers provided and your child can take your or their friends’ or siblings’ order. A play register could be included in this play – possibilities are endless and a lot of fun.
Dandelion Fingerprint Art
What you will need for this art project is white, brown, and green paint, a small paintbrush, paper a Q-tip and a finger.
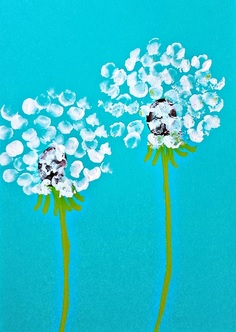
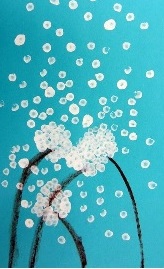
The easiest way to start this project is by dipping your child’s finger into the brown paint and pushing it down on the paper. The stem can also be done with your finger or you can use a small paintbrush. After the colors dry, dip your child’s pinky finger in the white paint to complete the dandelion.
Variation: Instead of your child’s finger you can also let them use a Q tip.
Frog on Log Art with Song
For this art project you will need some green and brown paint, a black sharpie, red paper, glue and a wine cork.
To start have your kids dip the wine cork into green paint and make 5 dots on a paper. With their fingers or thumb they can dip into the green paint and push down on the paper next to the wine cork print to create the frog’s legs. Depending on your child’s age cut or rip a small piece of red paper and have them glue on a tongue once the paint dries. Lastly, use the black sharpie to add the eyes and use the cork again with brown paint to stamp on the logs.
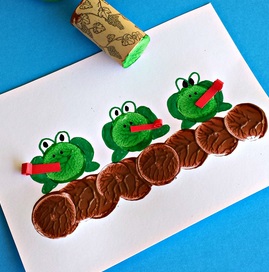
We did this project along with the song “Five little speckled frogs” and did five papers with 5, 4, 3, 2 and 1 frog.
The lyrics of the song are as follows:
“Five little speckled frogs
Sat on a speckled log
Eating the most delicious bugs
One jumped into the pool
Where it was nice and cool
Then there were four green speckled frogs.”
You start with 5 little speckled frogs and the verse is then repeated with one fewer frog each time. The final verse ends “Then there were no speckled frogs”.
If you don’t know this song you can find many different versions on YouTube to view:
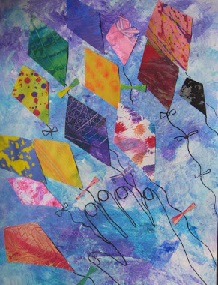
Kite Art
This project is an excellent way of using up any scrap paper you have around the house. To accomplish this look you sponge paint on a piece of paper with various colors. Once the paper is dry use a pen (sharpie seems to work best) to trace your child’s hand. Next cut (if you have smaller children you can prepare this ahead of time) some kite shaped pieces and have your child glue them on the paper. Draw the kites strings and ties or use any left over ribbon, etc. to glue on.
Books you can read with your child about kites:
“If I Were a Kite” by Wendy Wax: There is a small kite at the front of the book that fits on your child’s finger. As the story progresses, they can make the kite soar through the pages until reaching the end of the book.
“Kipper’s Kite” by Mark Inkpen: This is a touch and feel book
“Corey’s Kite” by Hannah Roche: Learn about weather as Corey flies his kite.
“One Windy Day” by Jane Caraway: When Janey’s kite gets stuck in a tree, her friends are there to help her retrieve it